Monday, October 16, 2017

Assignment #5: Using a Bluetooth GPS with your IOs device

Introduction:

Technology has advanced a rapid rates over the past few decades. GPS units are now compatible with with mobile, laptop, and tablet devices to use as an interface tool. This lab revolves around connecting the Bad Elf GPS with an IOS device using bluetooth. By doing so, the GPS unit makes the GCs more accurate. On top of that, it eliminates the need for WiFi. There are several applications compatible with Bad Elf via an IOS device including:
  • Collector for ArcGIS
  • Survey 123
  • GIS4Mobile
  • Theodolite HD
  • Fog of World
  • Gaia GPS Classic
  • Galileo Offline Maps
ArcCollector for GIS was a great app that allows you to download offline maps, and collect data improving the efficiency and accuracy of the GIS. It allows you to work on maps that you have uploaded onto your ESRI account so you can create track logs, look for places and features on the map, and even attach photos to GCP's on the map.


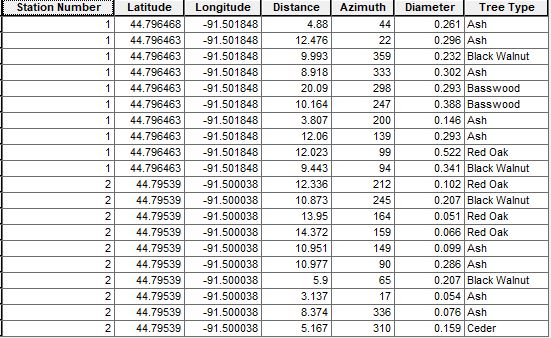
Figure 1 displays two screenshots of the Arc Collector application.


Survey 123 was also a very useful app. You can also download maps offline as well as any forms that have been shared with you. It enables you to add Interval, Ratio, Ordinal, and Nominal data to any location as needed.


Figure 2 shows two screenshots of the Survey123 application


GIS4Mobile is an application allowing the user to synchronize GIS data with data that they collected field data in a very user-friendly way. You can practically do anything with data including inspections, documentation, data-collection, an registration. Plus, it allows you to connect with GIS enterprise and and fieldwork all free of charge.

Theodolite is an application used for hiking and off road traveling. It has a multi-function viewfiedner for Ipads and gives live visuals of contour lines, roads, trails, and other feature classes. It also allows you to Geotag photos as well to showcase your experience. It is used for all sorts of outdoor activities, by all sorts of fields workers and sportsman.

The Fog of World is a fun web applications, and the only one that is actually considered a game. As you explore areas it removes fogged out areas near the vicinity and gives out badges urging the user to travel and explore more around the whole world.

The GAIA GPS classic is another interesting application that is used for planning trips for hiking in the woods and doing other off road traveling. Again this application allows you to download offline maps so that you aren't navigating through the woods and get lost because you can't get signal. It also tracks your route so you can go back the way you came.

Galileo Offline Maps can download maps to anywhere you want. It allows syncing of Geodata, GPS recording, and when finished sharing the Geodata as well.

Methods:

For this lab the class was split into different groups, and told to make a track using the Bad Elf and logging it on the GPS. After making sure the Iphone was paired with the correct number on the Bad Elf, each group was sent in separate directions to crate there own paths. Once the path was completed, the groups came back to the lab, and uploaded from the Bad Elf app via the Iphone device this group used.


Figure 1. Displays the route this Group walked shown in Google Earth. 

After getting hands on experience with the Bad Elf App, students were instructed to install a few of the other applications that are also compatible with the Bad Elf GPSs.

For the last part of the assignment, Professor Hupy demonstrated the Galileo Offline Maps. It enables the user to download map tiles for campus and the surrounding area as well as the Wisconsin map in the Application. It uses cached maps which store copies of map images at different scales so that image services run faster. It also uses an external GPS, like the Bad Elf, to make mapping more accurate. The best part about the app is that it records your personal GPS track, so that you can go back and see all the different locations you've been to.

Discussion/Conclusion:

This assignment did a great job of showing how effective Geospatial applications are with IOS devices. Most of the applications were very simple to use, especially for anyone who has background knowledge in Geography. For Geographers out in the real world, they can see data instantly uploaded to their work rather than having to record data from a standard GPS or in a field notebook then later enter manually on to the computer,  There is no doubt that applications like this will continue to get better and better as technology continues to advance at the rate it has been over the last 5 or 10 years.

Sources:

https://itunes.apple.com/us/app/collector-for-arcgis/id589674237?mt=8

https://itunes.apple.com/us/app/survey123-for-arcgis/id993015031?mt=8

Field Activity #4: Development of a Field Navigation Map

Introduction:

This field activity revolves around the creation of a field navigation map in preparation for another navigation activity taking place later in the semester. By using a given Priory Area, two maps are to be created. The first uses a UTM projection, and the second uses a geographic coordinate system with decimal degrees.

Methods

UTM Map

For the UTM map, use a measured grid. A good interval for the grid is 50 meters. Make the primary font size 8 and black, and the secondary font size 5 and grey. Make sure to make the grid line black so it is easier to see.

Figure 1

To make the contour lines more legible, use the contour spatial analysis tool. To switch the contour interval from 2 feet to 5 or 10 feet. This map will use 5 feet intervals.

Figure 2 displays the contour (spatial analysis) tool window


To make things even less messy one can simply clip all contour lines within the study area. To do this search for clip input the contour line feature class, then drag Navigation boundaries in for clip features, and name the output feature class whatever you.

Figure 3 shows the Clip tool window

Decimal Degrees Map

The second map needs to be in Decimal Degrees. Use a graticule grid for this map.

Figure 4 shows the Grids selection window

Switch the intervals for parallels and meridians to 2 seconds.

Figure 5 shows the create a graticle window.

Go into the Grid Label Properties and switch the label type to Decimal Degrees, then under Fraction values, click the check box and choose 3-4 decimal places.

Figure 6 shows the Grid Label Properties

Results/Discussion

The Navigation maps developed in this assignment use the same given boundary and Digital elevation models. The two created in this assignment use UTM and Decimal degree grids. Both use elevation contours, with 5 feet intervals which spaces things out and makes the map easier to interpret. It goes to show that although maps may vary with different techniques and features, a nearly identical outcome can still be achieved.

UTM Map:


Figure 7 displays the UTM grid map.

Decimal Degrees Map:


Figure 8 displays the Decimal Degrees Grid Map


Sources

Priory Geodatabase, UWEC Geography Department., Dr. Joseph Hupy


Monday, October 9, 2017

Field Activity #3: Evaluation of UAS Platforms and GPS Units for Ground Control

Introduction:

On September 30th, 2017, the Geo-spatial Field Methods class went to the Litchfield Mine to record  ground control points using high and low quality GPS, and to gather aerial imagery using different types of UAS platforms. The end goal is to compare the gathered data in order to find out which of the equipment is the most accurate. The types of equipment used at the mine to collect the ground control points were: a Bad Elf GPS, a Mobile Device GPS, a Topcon HiPer HR, Topcon HiPer SR, Arrrow GPS Markers, and Ground Control Point markers. The UAS equipment used to gather aerial imagery included: the DJI Phantom 3 Pro , Sensefly Ebee, M600 Pro w/Zenmuse X5, M600 Pro with GeoSnap PPK, and a C-Astral Bramor w/ Sony a6000. On top of that the class also got to see two types of Toposurvey equipment which were the Topcon Total Station and the Topcon Robotic Station

The whole class started out the day walking around the study area and placing different control points. The two class sections were split up into three different groups. Each group was given a Bad Elf GPS and a Topcon Survey GPS unit. Each group then collected the latitude and longitude coordinates using the two GPS units as well as a mobile device GPS. Once all the GCPs were collected the class moved to an open area to which the UAS drones were deployed.

Study Area

The Litchfield Mine was southwest of Phillips hall, and roughly ten minutes away. This mine is an aggregate mine right along the west side of the Chippewa River, and is hundreds of feet deep of fluvial deposition river rock from the meandering river. The elevation was relatively the same throughout the study area, but there was many piles of the river rock spread out. The Mine was surrounded by Forests to the South and to the West.

Figure 1: Map of Study Area

Methods:

High quality Ground Control Points are needed in order for High quality UAS surveys. Professor Hupy instructed the students to lay down sixteen separate Ground Control Points spaced out equally throughout the Litchfield mine, making sure none of them were close enough to be overlap another. Once the GCPs were laid out, we gathered the coordinates using three different GPS units. The UAS equipment's will then use the GCPs to gather centimeter accurate aerial imagery. The following content will give an in-depth analysis of the different GPS, Toposurvey, and UAS equipment that was used during the field outing.

Topcon HiPer

When recording data with this survey GPS, you must wait until the control panel says fixed. If it is at 0% and yellow, stop it and start over. Once it completes collecting thirty coordinates, hit store than save. This will help give you real time accuracy of just two centimeters. However it is capable of achieving sub-centimeter accuracy.

Arrow GPS Markers

The GPS markers were explained by PJ Kirkpatrick, who flies drones for a company called Terra Viglis. These instruments are a 2 by 2 foam solar GCP. They communicate with satellites, and the propeller gets the accuracy around 2-6 centimeters. They are 500 dollars per unit. The limitations are that once you press the button to collect the point, it collects until it is done not allowing any real time access. The advantages to this GPS are that it is water proof, very accurate, durable, and light. On top of that the points talk to each other which helps get even more accurate points. This instrument is also good for topography, 3D-models, and measuring amounts of dirt.

DJI Phantom 3 Pro

The first drone the class got to see was a rotary-wing drone called the DJI Phantom 3 Pro, flown by PJ Kirkpatrick. It costs roughly 30,000 dollars. This drone includes a MOCO feature which is short for Minimal Obstacle Collision Avoidance, allowing for the safest flight path. It is a manual drone that records data from an average of 250 feet. PJ used an app called drone deploy to control the Phantom. The phantom has roughly 30 minutes of battery life, and can fly continuously. By the end of the flight path, it had taken 222 photos of the study area.

Figure 2 displays the DJI Phantom 3 Pro

Video 1 shows the Phantom take off
Sensefly Ebee

The first of the two fixed-wing drones was called the Sensefly Ebee flown by Josh Nave. This drone can cover a lot more ground on one battery and fly for 59 minutes, but due to military law, it can not be in the sky for more than an hour. It also has a autonomous flight plan, a multi spectral and thermal camera, and the prop is designed to breakaway. Josh holds the drone in the air, until it is ready for take off. It then marks the launch point as the home point, and will return home if the wind speed gets too high or the GPS signal is bad. The disadvantages are that it needs a run way when its about to land, and it is not the best for recording data of small spaces. Josh has an insurance package called Always-on which is a two-year, two-replacements within 48 hours of the crash.


Figure 3 displays Josh Nave prepping the Sensefly Ebee


M600 Pro w/ GeoSnap Pro

The second multi-rotar drone was the M600 Pro. This is a reliable drone that is separate from the platform. It has a built in GPS, and if you take the sim card out you can see the overlay quality right after. It also has built in RTK (Real Time Kinematic) which communicates with the GPS on the ground to fly withing centimeter accuracy.

C-Astrol Bramor w/ Sony a600

The second fixed-wing drone was brought by Peter Menet who owns a company called Menet Aero. This drone goes for 70,000 dollars on the market. It has a long time flight time, which can exceed the legal 59 minutes of flight time. It also has a parachute that is deployed when it is ready to land.

Video 2 shows the C-Astrol Bramor takeoff in Slow Motion

Topcon Robotic Total Station

This Toposurvey instrument gathers information by shooting lasers that reflect to create 3-D models. It is great at reading angular distance and can measure specific dimensions. It scans point about once every couple seconds, and costs 22,000 dollars.


Results/Discussion:

The Geospatial Field Methods class used various GPS units and UAS equipment to gather Ground Control Points and aerial imagery. For the GPSs, we know that the mobile device will be the most inaccurate, the Bad Elf's were the second most accurate, and the Topcons were definitely the most accurate. However, we still need to map the collected to coordinates out to get the physical proof. Each group entered their coordinates from the Bad Elf and Mobile Device into a Microsoft Excel Spreadsheets as seen in Figure 4 and 5. The class is still waiting for the centimeter accurate Topcons GPS results.

Figure 4 displays the coordinates recorded by the Bad Elf GPS

Figure 5 displays the coordinates recorded by the mobile device GPS
As far as the drones go, the fixed-wings a much higher crashing rate than the rotary wings. However, the fixed-wings tended to have a longer battery life for more flight time, and collected photos at a much more effective rate.


Monday, September 25, 2017

Field Activity #2: Conducting a Distance Azimuth Survey

Introduction:

The second exercise of the course dealt with the surveying of a grid based coordinate system on small plots. In order to have a quality survey, a geographer needs to have precise GPS technology. However, in some cases this technology can not always be relied on, and therefore one needs to improvise. By using various hand-held tools to measure distances and azimuths one ran coordinate different points to create a map. In this case the latitude and longitude will only be given for the base points of which one stands. The surrounding trees will all be mapped according to the distance from that origin point.

Study Area:

This Field Activity was done on Putnam trail, which is located south of Phillips hall (see figure 1). The base points were roughly 300-400 feet from the back of Phillips. Data was collected from standing on the dirt path, and picking ten of the surrounding trees for the measurements. The trees utilized for data collection were chosen by the groups rotating 360 degrees without moving from the base point. The red path below is rough estimate of the Putnam trail location.

Figure 1 displays the study area of the Distance Azimuth Survey.


Methods:

In order to get the survey results, each group had to record the latitude and longitude of the base point, the azimuth of the tree from the origin spot, the circumference of the tree, and the distance from the base point. The gadgets this class used to help obtain these statistics were: a GPS, a hand-held laser measure, a measuring tap, and a azimuth compass. This group also recorded the tree types thanks to the professor's guidance.


Figure 2 displays the hand-held
 azimuth compass
The instrument we used to measure the azimuth is shown in Figure 2. By looking through through a hole in the bottom, and keeping both eyes open, one can see the degree of each trees location relevant to the origin spot.

Figure 3 shows the GPS used to
mark the two origin locations


The GPS unit, shown in Figure 3 was used to record the location for both origin points in the survey. Due to the low-technology of the given GPS make sure to write down the coordinates in a hard copy.


Figure 4 displays the Measuring Tape


The measuring tape in Figure 4 was used to measure the circumference of the tree in meters. This is one the of the quickest and simplest ways to record the circumference.


Figure 5 Displays the hand-held laser
measuring device


 The last gadget used during the survey was the hand-held laser   measuring device, shown in Figure 5. Aiming the laser pointer   directly at a tree will show the exact distance from the the origin   spot to that tree in meters.


Each group used the previously explained techniques to collect the data on ten different trees at two different base points. Once all data for the Distance azimuth survey is recorded, it needs to be entered into a Microsoft office excel sheet, and then imported to Arc Map (shown in Table 1).

Table 1 displays the full results of the data recorded from the two base points

Importing the Data into ArcMap:


Figure 6 displays the data inputted into the correct field
Bring the table into the layers column under table of contents. Right click the table and choose display X and Y coordinates to make sure everything will match up. To help verify the accuracy even more bring in a base map. If the coordinates all match you, then click on the Bearing Distance to Line command out of the arc toolbox under Data Management tools in the Features category to import the rest of the data (see Figure 6). This tool creates a new feature class using the latitude and longitude coordinate fields values giving you geodetic line features. Once the correct information is entered click "OK". Then ten poly lines will appear branching off each base point to the approximate tree location.


After that utilize the Feature Vertices to Points command also in the arc toolbox. This tool can be found ten or so tools down from the Bearing Distance to Line command tool, but you can also just search for it. This tool will allow you to create a new feature class made up of points that are generated from specific locations. Enter the new tree feature class under input features, choose a name under output feature class, and lastly select end for the point type. The points will be placed on the end of the polylines created by the Bearing Distance to Line command. Then right click on the newly created feature class, go to properties, and under 'symbol' make a proportional symbol map based off the tree diameter. Any maps created must include a north arrow, a scale bar, a locator map, a watermark, and a data source.

Results: 

Once you have completed all the steps under the methods subheading, the results will be ready. This group had very few complications while completing the methodology portion, but going through the previously explained methods above, the solution to any issues should be obtainable. As you can see in Figure 7, this distance azimuth survey proved that by using a compass, a laser pointer, a measuring tape, and a azimuth recorder, a fairly accurate map can be produced. Any inaccurate data can be blamed on human error, but for the most part all the trees seem to be the exact distance away from the base point as they were in the field.

Figure 7 displays the final map created emphasizing on Tree Diameter.

Figure 8 shows a county level view of the study area


Conclusion:

After completing the Distance Azimuth survey, the grid based coordinate system proved to be an accurate way to map the necessary technology isn't working. It is a simple technique, making it easy to acquire the data necessary without the technology. With that being said there is more room for human error when it comes to collecting the points. The assignment went pretty smoothly, but the only error I came across were slightly inaccurate GPS points

Sources:

Hupy, Joseph. (2017). Field Activity #4: Conducting a Distance Azimuth Survey. [PDF Document]. Retreived from : UWEC D2L, Geography 336.001 Lab Contents.

Teh, Steve. Biology 3A: Ecology: Point-Quarter Sampling. Report no. 3A. Biologiical Services Department, Saddleback University.


Monday, September 18, 2017

Field Activity #1: Creation of a Digital Elevation Surface using critical thinking skills and improvised survey techniques

Introduction:

This exercise revolves around using a sampling technique to create a small-scale digital elevation surface derived from a sand-box. Sampling is a quick and effective method for investigating an entire population of a specific area. The process involves collecting data on a small section of a whole sampling frame, and in turn, it can assist in configuring the rest of the picture.Various types of sampling techniques include:

- Systematic Sampling (Point, Line, and Area)
- Random Sampling (Point, Line, and Area)
- Stratified Sampling (Systematic, Random)
- Cluster Sampling
- Multistage Sampling

After choosing one of the sampling techniques, the objective is to construct a Ridge, Hill, Depression, Valley, and Plain by utilizing the sand (seen in Figure 1 below). The final process will be mapping out the elevated surface using the original survey technique.

Figure 2 displays the features mention above.

Methods:


Group two chose to use the systematic sampling technique due to its even distribution of various points, making the Digital Elevation Map more accurate. Methods similar to this technique are.

The location of Group Two's sample plot was located east of Phillips hall right off the other side of Roosevelt avenue. The area was approximately 30 meters from the loading dock, and in the middle of the three sandboxes. Group Two used a meter stick, strings, and tacks to create an accurate and evenly dispersed grid.

The Group made a total of 23 points on the Y-axis, and 23 points on the X-axis spread out at five centimeter intervals as seen in Figure 2 below.

Figure 2 displays the first half of the grid with lines parallel to the X-Axis

Next, the group decided sea level would equal the lowest point of their Digital Elevation Model. Then they created a table with three columns labeled X, Y and Z. The elevation (Z) was recorded by measuring the distance from the sand to the string every five centimeter interval of the x-axis and y-axis rounding to the nearest millimeter. Once group member measures each point, while another records the data. The group choose this method because it was quick and effective.

Results/Discussion:

There were a a total of 576 points recorded on the grid for group two. The range of of the sample points varied from a minimum of 4.5 cm to 19.6 cm.  The mean was 12.8 cm with a standard deviation that comes out to be roughly 2.81. Group Two found that the systematic method was closely related to the sampling, and would have not chosen another method. Therefore the group stuck to the original plan the whole time. The only problem this group found was losing track of which point was being measured. However, it was an easily fixed by simply restarting the measuring from the beginning of the row.

Conclusion:

The systematic sampling technique utilized by group two relates to the definition of sampling because they were able to investigate most of the population. However, rather than doing a small section of a sampling plane the group did the whole thing. Sampling is used in spatial situations because it nullifies any biases one would have while collecting data. This activity related to sampling spatial data over larger areas because if you can sample a smaller area you can do the same technique with a larger one. This group found that their survey did an exceptional job of sampling the area within the sand box due to the widely distributed elevation of the points properly representing its features. This survey could be refined by adding more points. This group also could have found a more precise mean of measuring the elevation due to the meter stick pushing the sand down a different amount every measurement.

References:


"Sampling Techniques." Sampling Techniques. N.P., n.d. Web. 09
Sept. 2017. http://www.rgs.org/OurWork/Schools/Fieldwork+and+local+learning/Fieldwork+techniques/ Sampling+techniques.htm